Interfaces

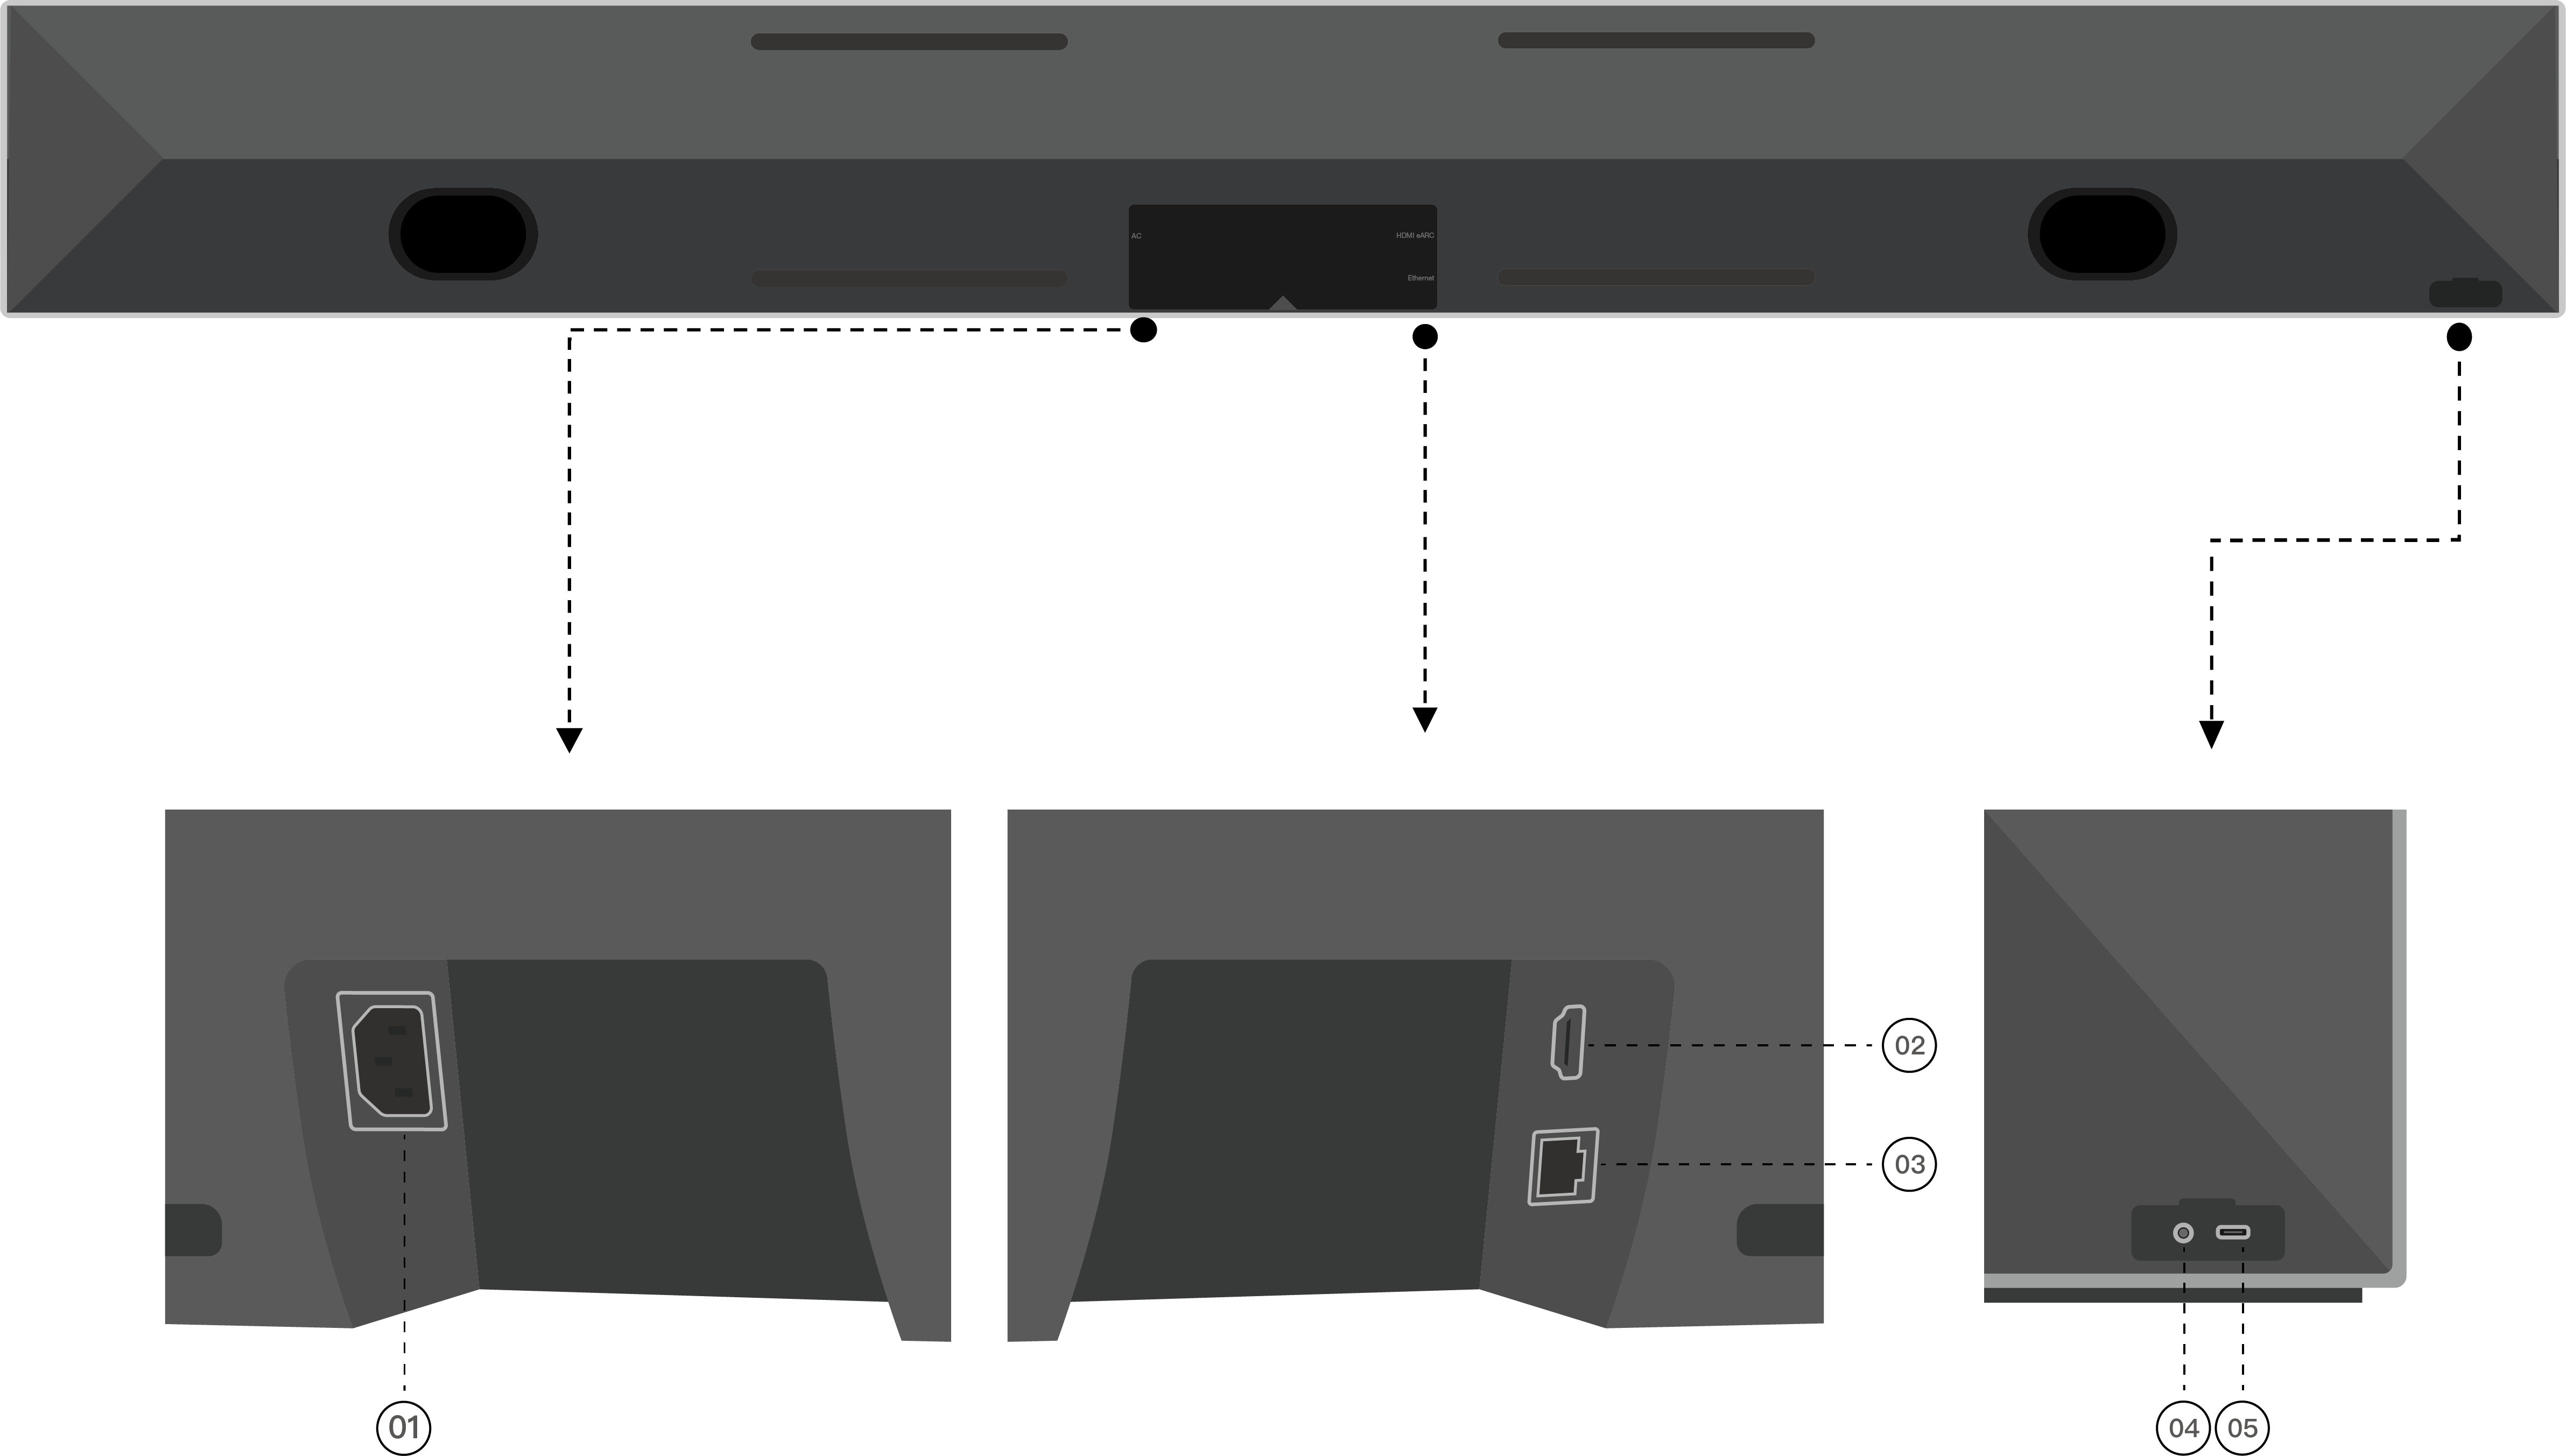
Opus One - Interface
  1. 01 AC Power input
  2. 02 HDMI eARC port
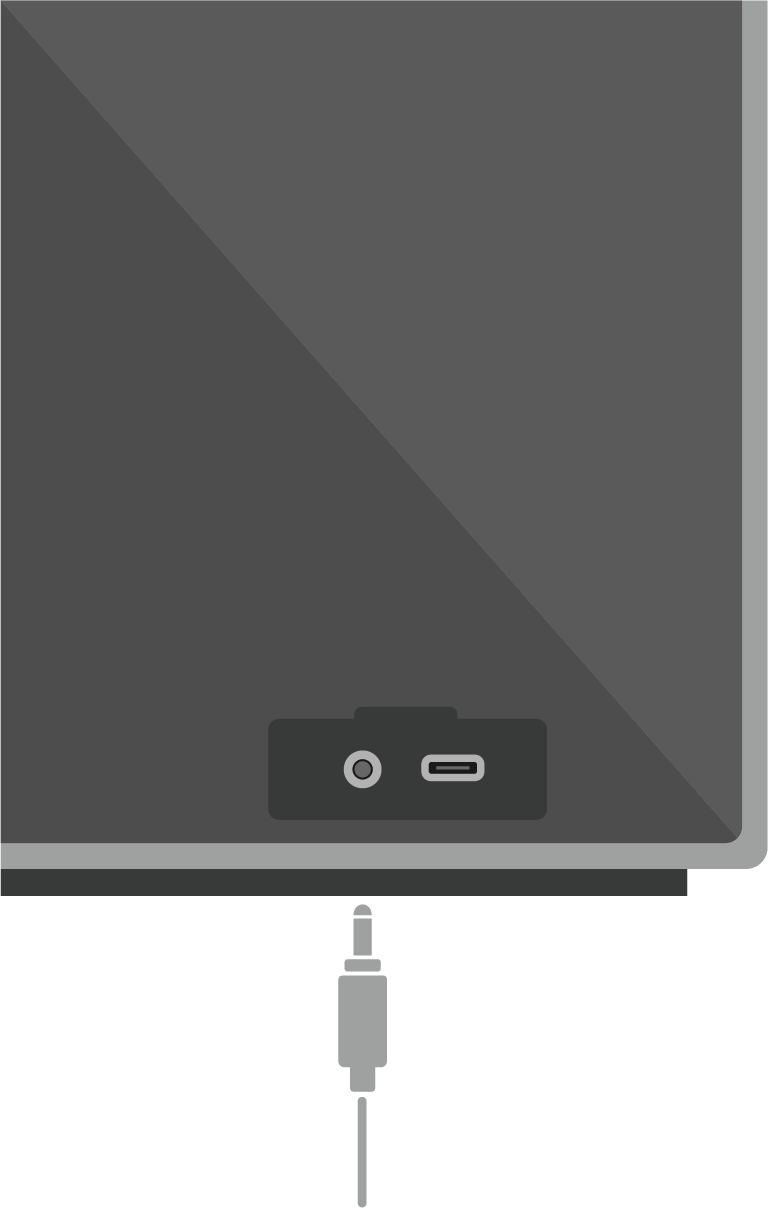
  3. 03 Ethernet port
  4. 04 Line input
  5. 05 USB-C port
01
AC Power input

Use only the included power cable. Using a third-party power cord will void your warranty.

02
HDMI eARC port

Connect Opus One to your TV's HDMI eARC port with the included cable.

03
Ethernet port

For wired network connection.

04
Line input

3.5 mm stereo analogue audio input.

05
USB-C port

Service only.

Buttons and Control
Buttons and Control
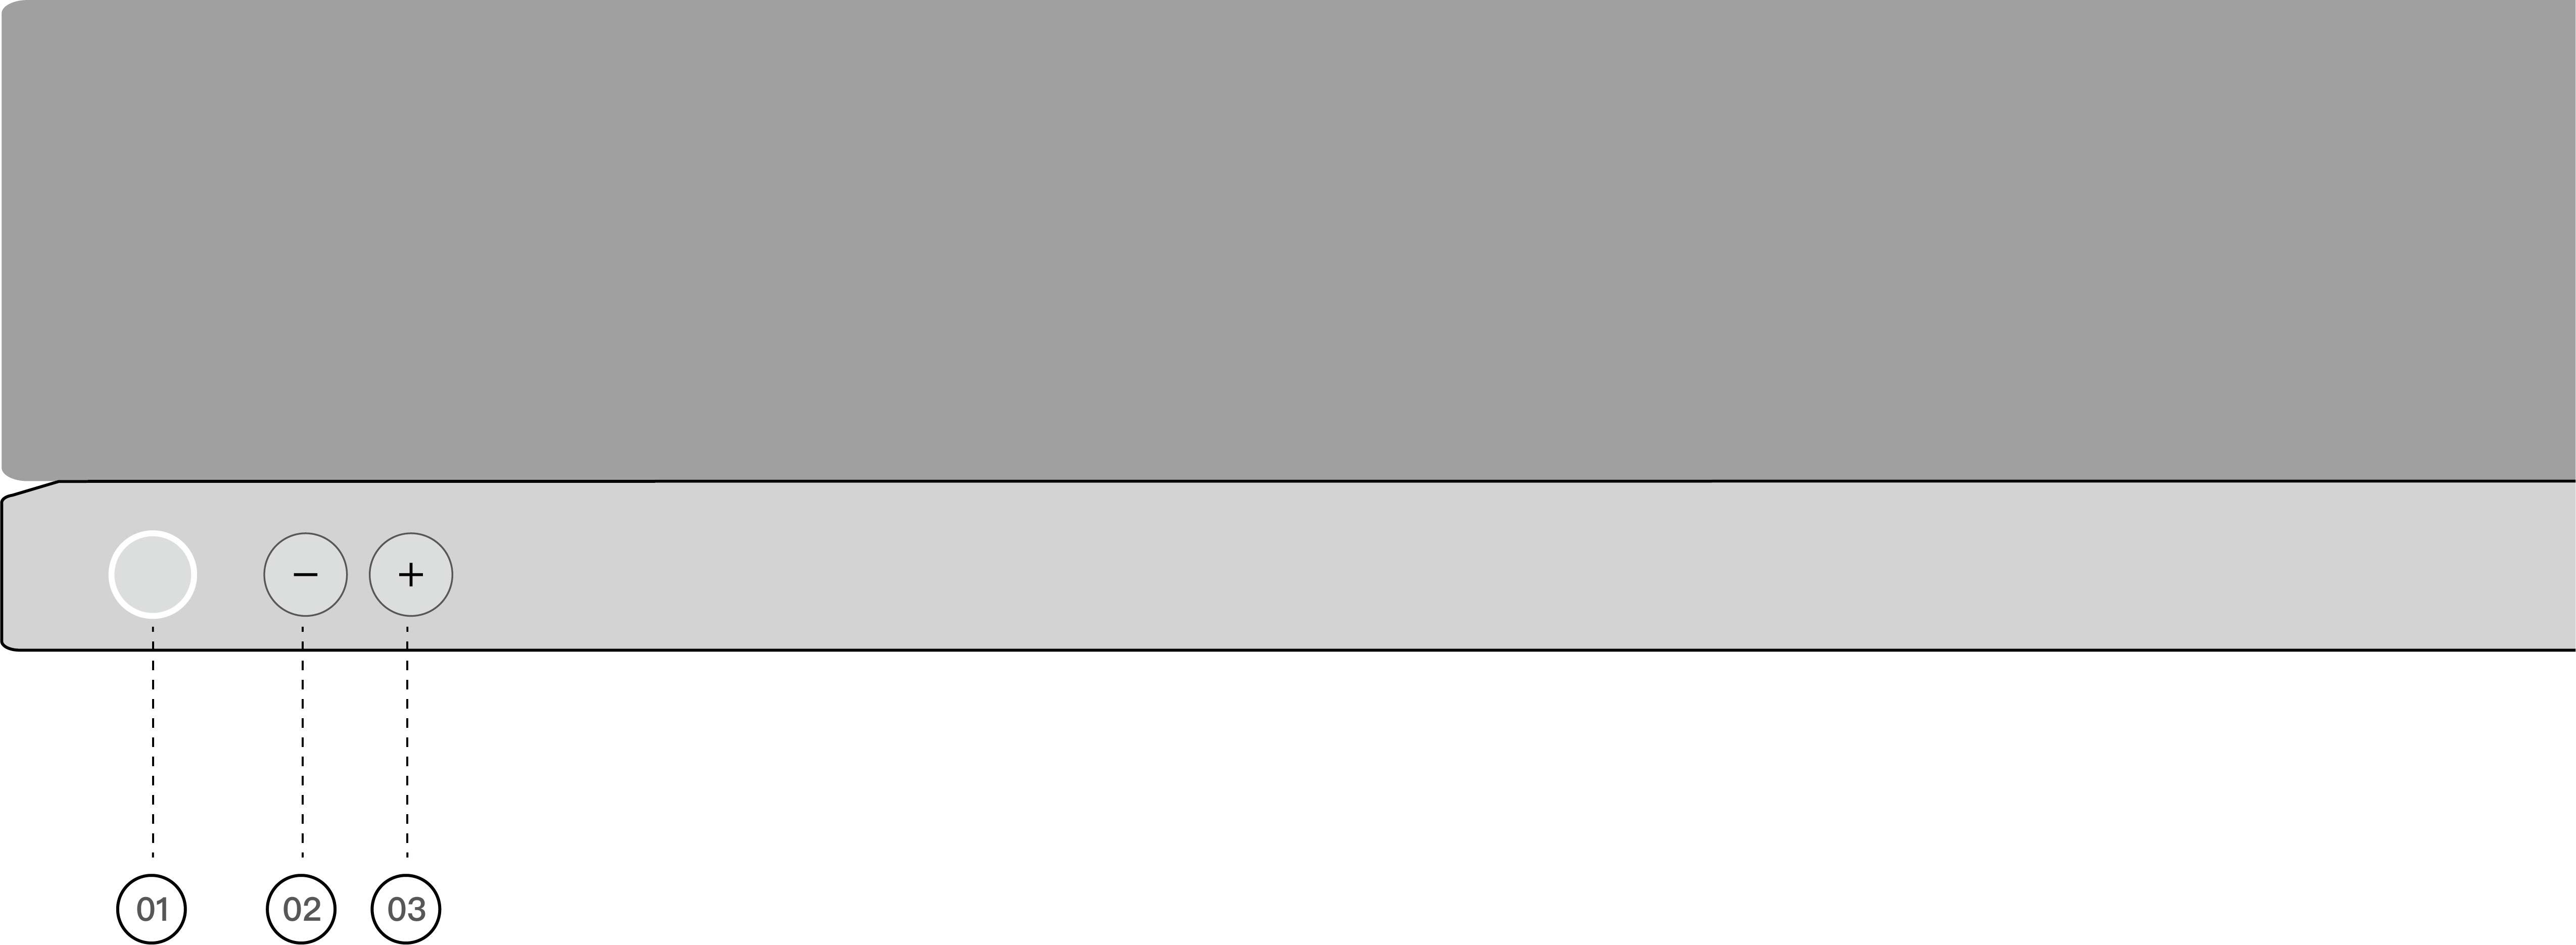
  1. 01 Multi-function button
  2. 02 Volume down button
  3. 03 Volume up button
Multi-function button
  • Power on or wake up Single press.
  • Pause or resume Single press.
  • Skip to the next track Double press.
  • Skip to the previous track Triple press.
  • Enter standby mode Long press for 3 seconds.
  • Enter pairing mode Long press for 7 seconds.
Volume down button
  • Volume down Single press to decrease volume stepwise. Long press to decrease volume continuously and rapidly.
Volume up button
  • Volume up Single press to increase volume stepwise. Long press to increase volume continuously and rapidly.
Button combination
Force restart - Press and hold “Multi‑function” and “Volume down” simultaneously for 3 seconds

Connections

After positioning Opus One in its intended location, or during the installation of the official Opus One stand, connect the system using the included cables.

Before you begin
  • Disconnect your TV from any existing home theatre or external audio system.
  • Connect external source devices, such as a streaming player or Blu-ray player, directly to your TV.
  • Turn on your TV before setup.
Step 1
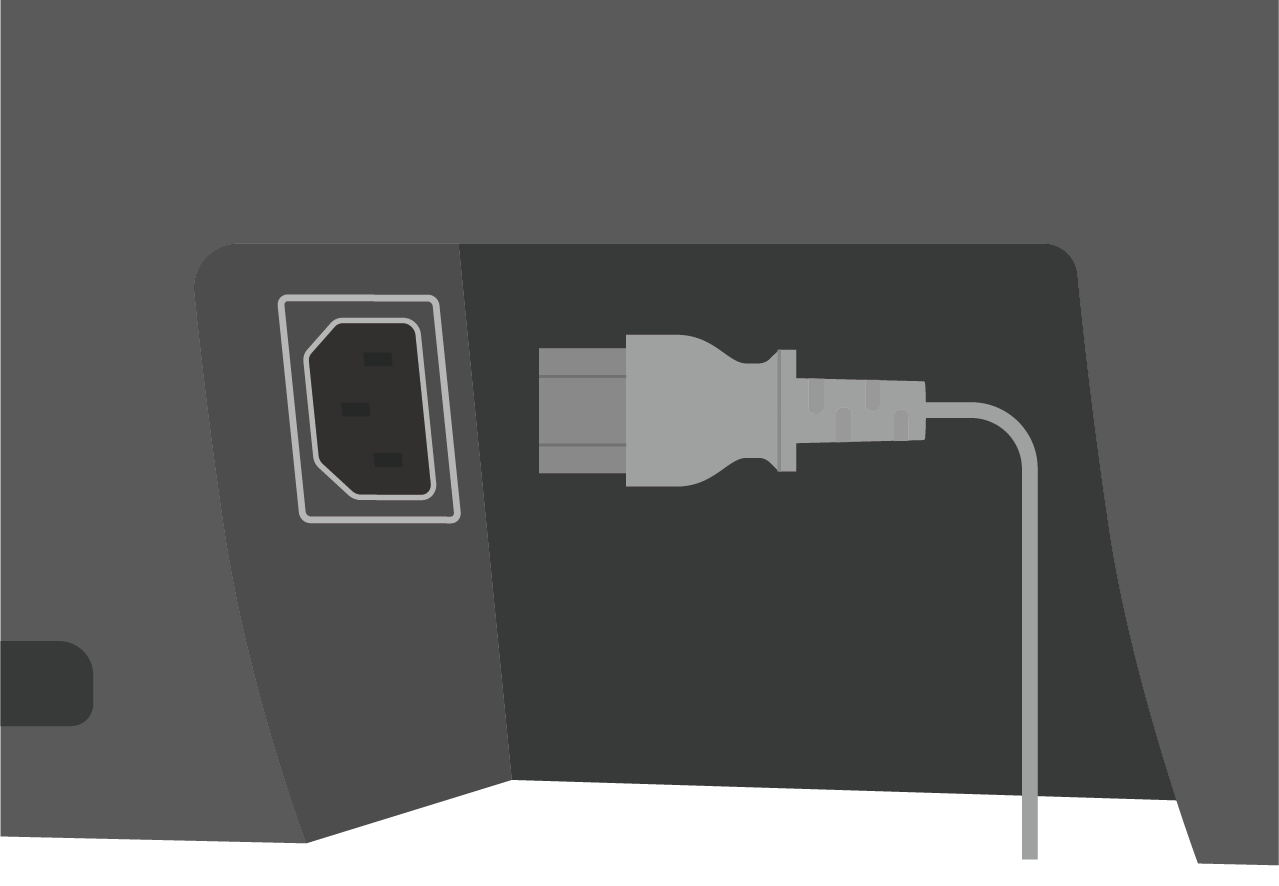
Connect Power

Connect the included power cable to the AC input port, then plug it into a grounded mains outlet (100-240 V~ 50/60 Hz).

For safety and optimal performance, use only the included power cable.

Connections - Connect Power
Step 2
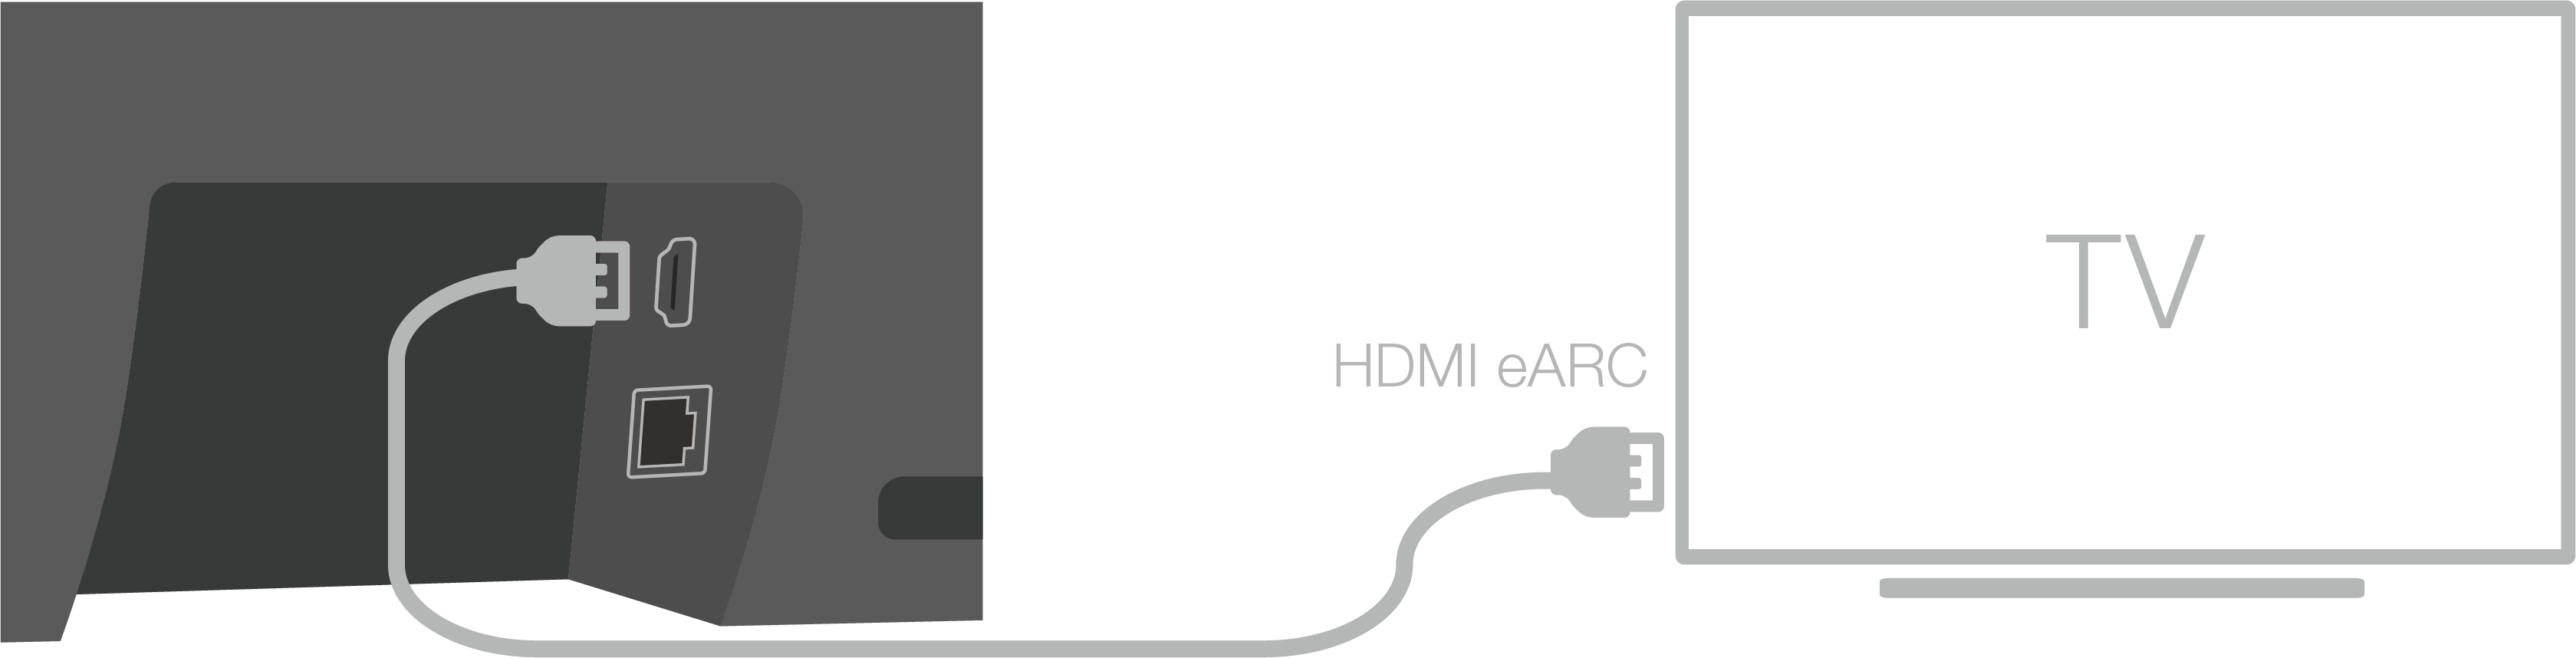
Connect HDMI eARC

Connect the included A/V cable between Opus One and your TV's HDMI eARC/ARC port.

For the best audio experience, use an HDMI eARC connection. Depending on your TV model, HDMI-CEC may need to be enabled in the TV settings.

Connections - Connect HDMI eARC
Step 3
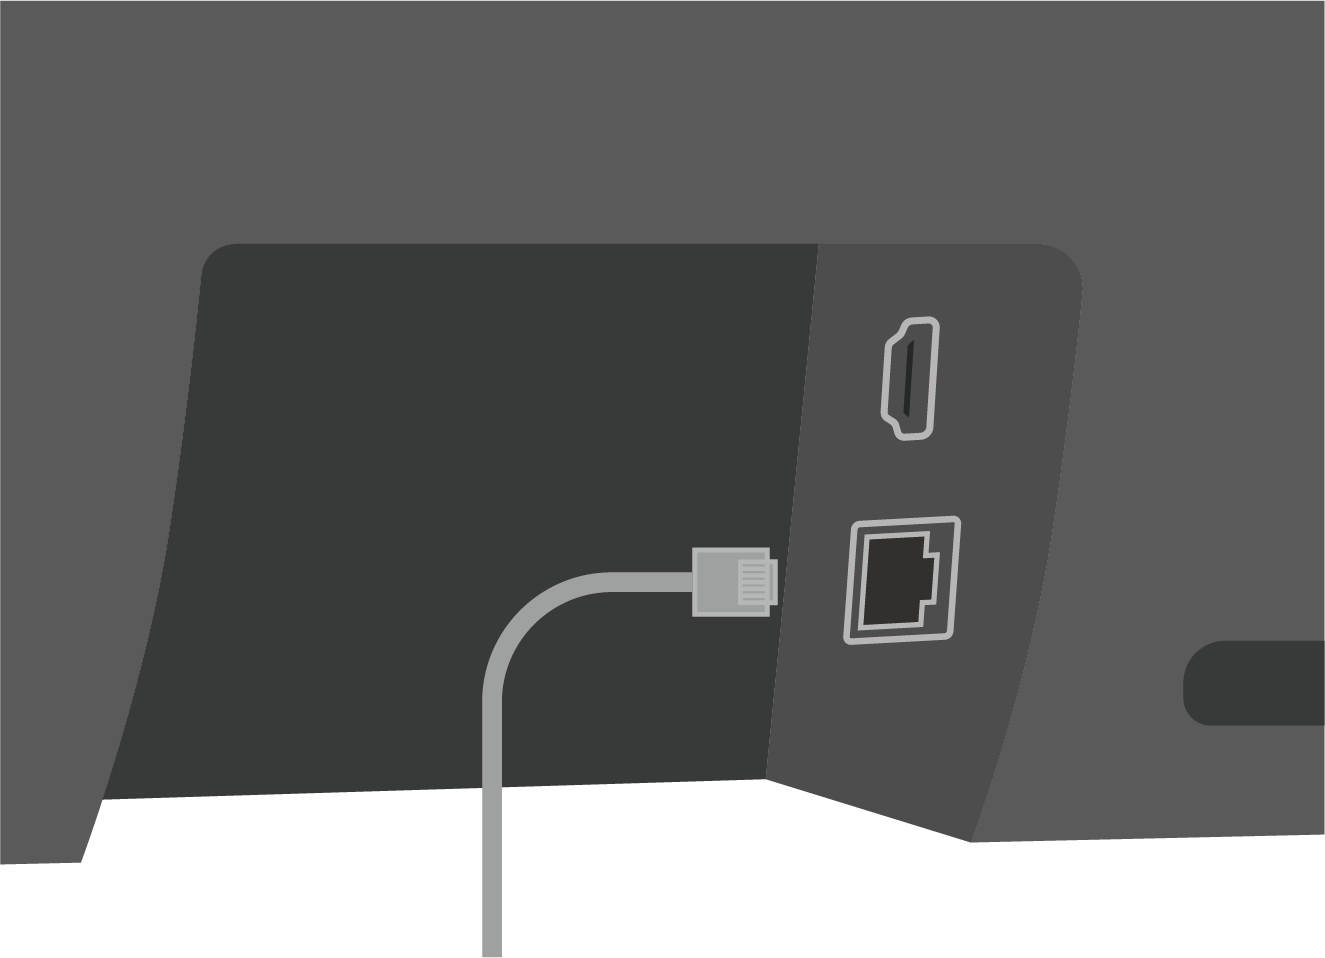
Connect Ethernet (optional)

Connect an Ethernet cable for a stable wired network connection.

Connections - Connect Ethernet
Step 4
Connect an external audio source (optional)

Connect an analogue audio source using a 3.5 mm stereo cable.

Connections - Connect External Audio Source

First-Time Setup

Before powering on, ensure all connections have been completed correctly.

Step 1

Power on

Press the multifunction button briefly to power on Opus One. System startup takes approximately 40 seconds. During startup, the wooden grilles open automatically and the status indicator illuminates solid white.

If no audio source is detected, the indicator flashes white until a source becomes available.

First Time Setup - Power On
Step 2
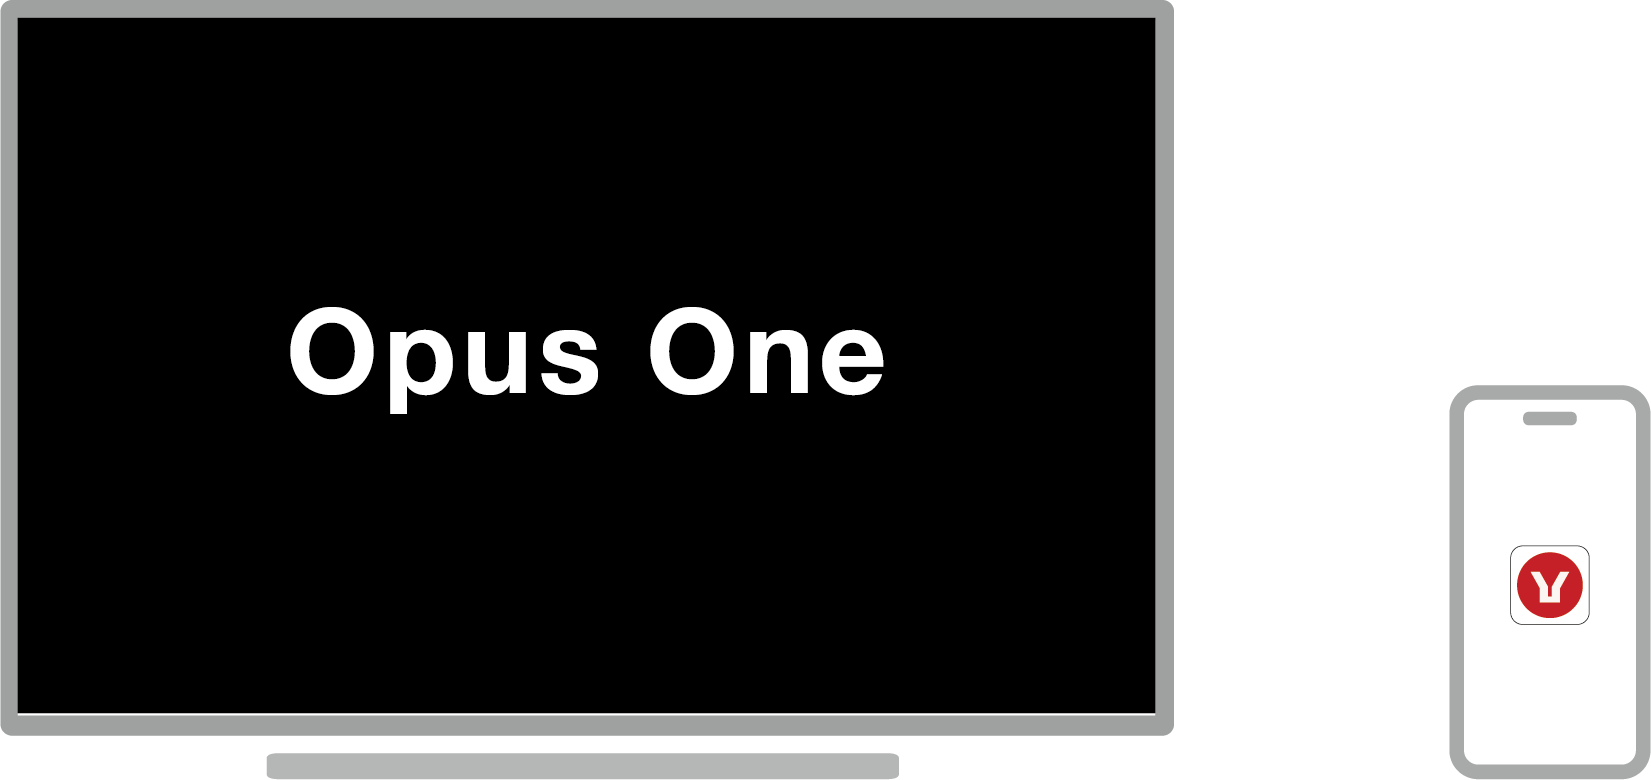
Select the TV Input

Switch your TV to the HDMI eARC input connected to Opus One using your TV remote.

select-the-tv-input
Step 3
Complete Initial Setup

Follow the on-screen instructions displayed through the built-in Symphony OS, or complete setup using the Dynaudio app.

First Time Setup - Complete Initial Setup
Step 4
Enjoy Opus One

Once setup is complete, Opus One is ready to play.

First-Time-Setup---Enjoy Opus One-1

Settings

The following settings are available via the system menu, Dynaudio app, or Symphony Remote.

Sound
Sound mode

Night: Compresses dynamic range to reduce sudden loud volumes.
Voice: Enhances dialogue clarity against background sound.

Preferences

Spatial Stage: Adjusts the perceived spaciousness for spatial audio content.
Tonality: Adjusts high /low frequency balance (brighter or more powerful).

Network
Wireless network

Connect via Wi-Fi.

Wired network

Connect via Ethernet (cable required).

Input source
Bluetooth input

Enter pairing mode (long-press multi-function button 7 s), then pair from your device.

Line input

Automatically detects and switches when a 3.5 mm cable is connected.

Control
Fins interaction

Enable/disable most fin motion functions.

Auto standby

If enabled, speaker enters standby after 20 min of inactivity/no playback

TV standby sync

If enabled, speaker sleeps when TV turns off (requires TV CEC support; may not work with all TVs)

Eco standby

When enabled, the speaker can be woken only by its buttons or the Remote Power button. When disabled, it can also wake via input source signals (for instance, AirPlay), but standby power consumption will increase.

Microphone

Enable/disable microphone (used only for room calibration).

Room calibration

Starts the room calibration procedure.

General
Language

Select system language

Region

Select your region

Software update

Check for and install software updates online

About

Product information

Product registration

Register your product (if not done during initial setup)

Restore factory settings

Reset all settings to factory defaults – use with caution.
Factory reset will not erase your Opus One's room calibration data.

Fins Interaction

The Opus One fins respond to system status, sound modes, and user commands. More interactions will be added via OTA updates.

System State / Action Fins Response
Initial setup
✓
Power on / wake
✓
Power off / standby
✓
Sound mode selection
✓
Preference selection
✓
Volume adjustment
✓

Indicator

The Opus One indicator light indicates the speaker status and the type of input source.

Indicator State System Status
Solid white

Normal operation

Off

Standby / powered off

Fast flashing white

Pairing mode

Orange, 3 fast flashes

Source connection failure / Software update failure

Breathing white (slow)

No source connected

Fast flashing orange

Device fault

Breathing orange-green-white (slow)

Firmware update in progress

Breathing orange (slow)

Factory reset

Solid green

Dolby Atmos playback

Solid cyan

DTS:X / AURO‑3D playback

Troubleshooting

The following provides common issues you may encounter during daily use and their corresponding solutions. If your problem remains unresolved, please contact Dynaudio customer service.

Problem Possible cause / solution

Incorrect input source selected

Check and select the correct source (HDMI, Bluetooth, line‑in, etc.) – ensure source is playing

Source device muted or volume too low

Unmute and raise volume on the source device

TV HDMI connection issue

Verify A/V cable is connected to the TV’s eARC/ARC port; set TV audio output to "external speaker/ARC/eARC" (naming varies by brand)

Speaker not powered on

Ensure Opus One is properly connected to mains and indicator is lit

Overheat protection due to poor ventilation

Clear obstructions, ensure vents are unblocked

Power supply problem

Verify mains voltage meets 100-240 V~50/60 Hz

HDMI cable not connected to eARC/ARC port

Connect to the TV’s dedicated HDMI eARC/ARC port

TV CEC not enabled

Enable HDMI CEC in TV settings (name may differ by brand)

Faulty HDMI cable

Try to replug the cable or try a different HDMI cable

Not in pairing mode

Long‑press multi‑function button for 7 seconds to enter pairing mode (white flashing)

Device out of range

Ensure Bluetooth device is within 10 m

Already connected to another device

Disconnect other Bluetooth devices and retry

Low battery

Charge via USB-C cable

Remote not paired

Re-pair the remote following the instructions

Foreign object obstruction

Check grille slots for obstructions - do not force

Motor failure

Contact after-sales service

Phone and speaker not on same Wi-Fi network

Ensure both are on the same network

Speaker not network-configured

Complete network setup via the system menu

Care and Safety Notes

To extend the service life of the product, please observe the following precautions during daily use.

Daily use
  • Clean with a dry cloth - do not use chemical solvents or liquids.
  • Unplug the power cable if the Opus One will not be used for an extended period.
  • Avoid using during thunderstorms - unplug when possible.
  • Do not place any liquid-filled objects (e.g. vases) on the Opus One.
  • Never cover the Opus One during operation – maintain good ventilation to prevent overheating
Installation
  • When installing with the official stand (sold separately), strictly follow the installation instructions and the important information card – improper installation may cause tipping or falling
  • Do not place the Opus One on unstable surfaces
  • Instruct children not to climb furniture to reach the speaker or its remote ventilation to prevent overheating.
  • Use furniture that can safely support the unit – ensure the Opus One does not overhang edges
  • If placing on tall furniture, secure both furniture and Opus One to an appropriate support
  • Do not place cloth or other slippery materials between the Opus One and supporting furniture
Health & safety
  • The Opus One contains magnetic fields - keep magnetically sensitive devices (e.g. pacemakers, magnetic cards) at least 10 cm away.
  • Avoid prolonged high-volume listening to prevent hearing damage.
  • Contains rigid metal components - maintain clearance to avoid injury or furniture damage from collision.
  • Instruct children not to climb furniture to reach the speaker or its remote.

Important Safety Instructions

  1. Read these instructions.
  2. Keep all warnings.
  3. Follow all instructions.
  4. Do not use this apparatus near water.
  5. Clean only with a dry cloth.
  6. Do not block any ventilation openings. Install in accordance with the manuals.
  7. Do not install near heat sources such as radiators, heat registers, stoves, or other apparatus (including amplifiers) that produce heat.
  8. Do not defeat the safety purpose of the polarised or grounding‑type plug.
  9. Protect the power cord from being walked on or pinched, particularly at plugs, convenience receptacles, and the point where it exits the apparatus.
  10. Use only attachments/accessories specified by Dynaudio.
  11. Use only with the stand, bracket, or package specified by Dynaudio, or sold with the apparatus. When a cart is used, use caution when moving the cart/apparatus combination to avoid injury from tip‑over.
  12. Unplug this apparatus during lightning storms or when unused for long periods.
  13. Refer all servicing to qualified service personnel. Servicing is required when the apparatus has been damaged in any way, such as power‑supply cord or plug is damaged, liquid has been spilled or objects have fallen into the apparatus, the apparatus has been exposed to rain or moisture, does not operate normally, or has been dropped.
  14. To completely disconnect this apparatus from the mains, disconnect the power plug from the mains socket.
  15. The mains plug or appliance coupler shall remain readily operable.
  16. Do not place naked flame sources, such as lighted candles, on the apparatus.
  17. This apparatus shall be connected to a mains socket outlet with a protective earthing connection.
  18. This apparatus shall not be used in tropical climates.

Specifications

Sound
Drivers

Tweeters ×6, midrange drivers ×14, dual-diaphragm bass drivers (TurboBass) ×4

Amplifier

28-channel Class-D amplifier, maximum output power 1500 W

Frequency response

29Hz - 21kHz

Maximum SPL

116dB@1m

Spatial audio / multichannel

Dolby Atmos, Dolby Digital, Dolby Digital Plus, Dolby TrueHD, Dolby MAT
DTS:X, DTS-HD Master Audio, DTS Digital Surround
AURO-3D
PCM Multichannel

Audio formats

AAC / HE-AAC, MP3, WAV, FLAC, ALAC

Sound modes

Night, Voice

User preferences

Tonality (bright / balanced / punchy), Spatial Stage (focused / standard / expansive)

Connectivity
Wireless

Bluetooth 5.4 (BLE/EDR), codecs: SBC, AAC, LDAC
Dual‑band Wi‑Fi 6 (2.4 GHz / 5 GHz)

Streaming

AirPlay2,Roon Ready, HUAWEI HiPlay

Wired connections

HDMI eARC x 1
AUX 3.5mm mini jack x 1 
USB-C x 1 – Service only
Ethernet RJ45 x 1

Control

Symphony Remote – playback control, speaker settings
Dynaudio app – playback control, speaker settings, content casting(Airable radio)

Power Consumption
Standby mode

≤0.5W, require 20 minutes to enter the mode

Off mode

≤0.5W, does not enter automatically

Other
Speaker weight

45kg

Speaker dimensions

1864 mm (W) × 236 mm (H) × 207 mm (D)

Input voltage

100–240 V ~ 50 / 60 Hz

Colours

Light oak, walnut